


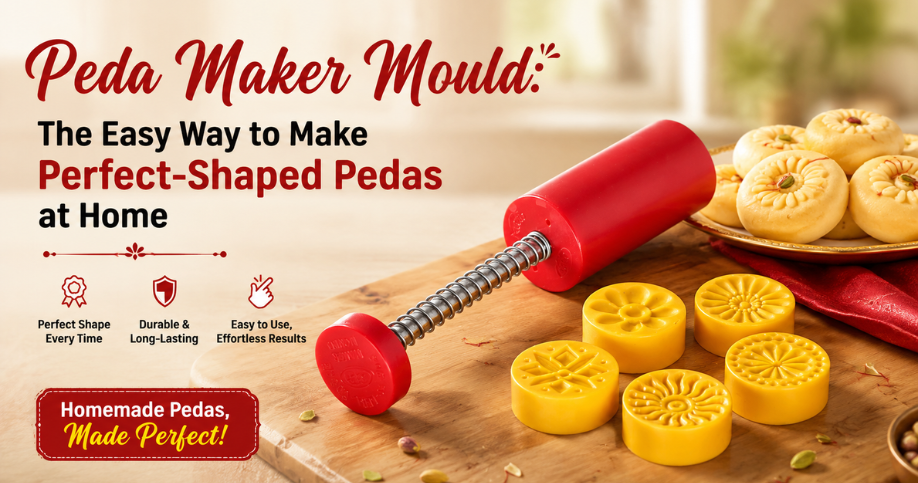
Pedas are among the most popular traditional Indian sweets, loved for their rich taste, soft texture, and simple yet elegant appearance. From festivals and religious celebrations to family gatherings and special occasions, homemade pedas are a delicious way to add a traditional touch to the dessert table.
However, shaping every peda by hand can take time, especially when you want all the sweets to have a similar size and attractive finish. A peda maker mould offers a simple solution by helping you shape peda mixtures quickly and consistently.
Whether you're preparing mawa pedas for a festival, making sweets for a pooja, or simply experimenting with homemade mithai, a peda mould can make the shaping process easier. It is especially helpful for beginners who want neatly shaped sweets without relying entirely on manual techniques.
If you're looking for a convenient tool for homemade peda preparation, explore the Peda Maker Mould here:
For more traditional kitchen inspiration, read our related blog:
https://90degreestore.com/blog/brass-mortar-and-pestle:-traditional-way-to-grind-spices-and-herbs
Let's explore how a peda maker mould can simplify homemade sweet preparation.
What Is a Peda Maker Mould?
A peda maker mould is a kitchen tool designed to shape peda mixtures into uniform rounds or decorative forms. Depending on the design, it may use a hand-operated push, spring, or press mechanism to create consistent shapes.
Instead of shaping every peda manually, you place the prepared mixture into the mould and use the pressing mechanism to form the sweet.
A peda maker can be useful for:
- Homemade peda preparation
- Mawa sweets
- Festival cooking
- Religious offerings
- Family celebrations
- Sweet gifting
- Preparing larger batches
Its simple operation makes it a practical addition to a home kitchen.
Why Use a Peda Maker Mould at Home?
Make Traditional Sweets More Convenient
Traditional peda preparation involves cooking the mixture, allowing it to reach the right consistency, portioning it, and shaping each piece individually.
The final shaping process can be repetitive when preparing a large batch.
A peda maker mould simplifies this step by providing a consistent shape and reducing the manual effort needed to form each peda.
1. Creates Uniformly Shaped Pedas
Give Homemade Sweets a Consistent Appearance
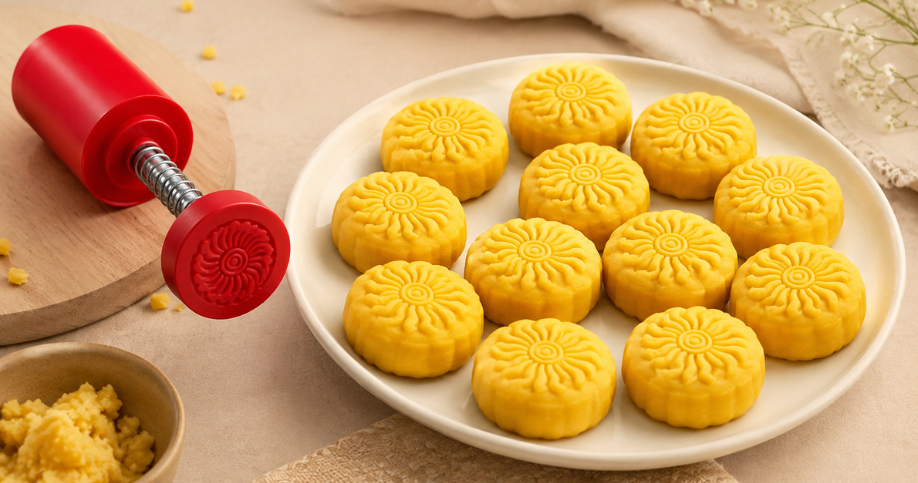
One of the biggest advantages of using a peda mould is consistency.
When pedas are shaped by hand, their size and thickness can vary. A mould helps create more uniform pieces, making your homemade sweets look neat and professionally prepared.
Consistent pedas are especially useful when serving sweets to guests or arranging them in a festive gift box.
2. Saves Time During Sweet Preparation
Prepare Larger Batches More Efficiently
Festivals and family functions often require a large quantity of sweets.
Manually shaping dozens of pedas can become repetitive and time-consuming. A peda maker mould makes the process quicker by streamlining the shaping stage.
This allows you to spend more time preparing the mixture, decorating the sweets, arranging the serving plate, or enjoying the celebration with your family.
3. Easy for Beginners to Use
Make Attractive Pedas Without Advanced Skills
Shaping traditional sweets by hand can require practice.
A peda maker makes the process more approachable for beginners because the mould helps guide the shape.
Once the peda mixture has the correct consistency, even someone with limited sweet-making experience can work toward more consistent results.
4. Improves Peda Presentation
Create Beautiful-Looking Homemade Mithai
Presentation is an important part of festive food.
Uniformly shaped pedas can make your serving plate or sweet box look more attractive. You can further enhance their appearance with simple toppings such as:
- Chopped pistachios
- Almond slivers
- Saffron strands
- Cardamom
- Coconut
- Edible decorative elements
A well-shaped peda provides a clean base for additional decoration.
5. Useful for Festivals and Religious Occasions
Prepare Traditional Sweets for Special Celebrations
Pedas are commonly enjoyed during festivals, pooja, religious gatherings, and family celebrations.
A peda maker mould can be particularly useful when preparing sweets for:
- Janmashtami
- Diwali
- Ganesh Chaturthi
- Navratri
- Raksha Bandhan
- Housewarming ceremonies
- Religious functions
- Family celebrations
A homemade peda prepared with care can make these occasions even more special.
6. Great for Homemade Mawa Pedas
Shape Traditional Mawa-Based Sweets
Mawa or khoya is commonly used to prepare several varieties of peda.
Once the mixture reaches the appropriate consistency and has cooled sufficiently for shaping, a peda mould can help transform it into evenly sized sweets.
You can experiment with different flavors and toppings while maintaining a consistent traditional shape.
7. Helps with Portion Control
Keep Each Peda Similar in Size
When making sweets for a family gathering, consistent portion sizes can make serving easier.
Using similar quantities of the mixture for each peda before pressing helps create pieces that are more uniform in size.
This is useful when preparing:
- Gift boxes
- Prasad
- Party platters
- Festival sweet trays
- Family servings
How to Use a Peda Maker Mould
Step 1: Prepare the Peda Mixture
Prepare your preferred peda mixture according to your recipe.
For mawa pedas, this may involve cooking mawa with sugar and flavoring ingredients until the mixture reaches the required consistency.
Step 2: Allow the Mixture to Cool
Let the mixture cool enough to handle comfortably.
The mixture should be soft and workable rather than excessively hot or liquid.
Step 3: Prepare the Mould
Clean and dry the peda maker mould before use.
If required by the product or recipe, lightly grease the mould to make releasing the peda easier.
Step 4: Portion the Mixture
Take a suitable amount of the peda mixture and place it into the mould.
Avoid overfilling because excessive mixture can make the pressing mechanism difficult to operate.
Step 5: Press the Mould
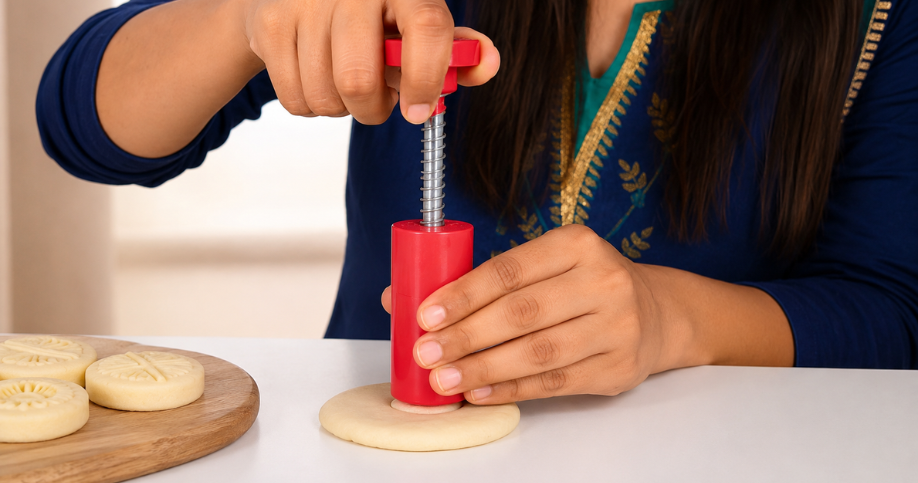
Use the hand-operated push or spring mechanism to press the mixture into the desired shape.
Apply controlled pressure rather than forcing the mechanism.
Step 6: Release the Peda
Carefully release the shaped peda from the mould and place it on a clean plate.
Step 7: Decorate
Add your preferred toppings, such as nuts, saffron, or cardamom, before serving.
Tips for Making Perfect Pedas with a Mould
Get the Mixture Consistency Right
The consistency of the peda mixture is one of the most important factors.
If the mixture is too soft, it may not hold its shape. If it is too dry, it may crack during pressing.
Aim for a soft, firm, and workable consistency according to your recipe.
Don't Overfill the Mould
Use a manageable amount of mixture for each peda.
Overfilling can make the mould difficult to close and may result in uneven edges.
Use Consistent Portions
Measure similar quantities of the mixture for each peda to achieve a more uniform batch.
Release Carefully
Avoid forcing the sweet out of the mould. A gentle release helps preserve the decorative shape.
Decorate After Shaping
Adding nuts or other toppings after shaping allows you to maintain a clean and attractive appearance.
Peda Maker Mould vs Hand-Shaped Pedas
Which Method Is More Convenient?
Both methods have their own advantages.
| Hand-Shaped Pedas | Peda Maker Mould |
|---|---|
| Requires more practice | Easier for beginners |
| Each peda may vary | More consistent shapes |
| Takes more time for large batches | Speeds up shaping |
| Traditional manual technique | Convenient moulding method |
| Greater freedom of shape | Consistent design |
A peda maker mould doesn't replace the traditional art of sweet preparation. Instead, it makes the shaping stage more convenient and repeatable.
Creative Ways to Decorate Homemade Pedas
Add Simple Traditional Toppings
Once your pedas are shaped, you can customize their appearance with different toppings.
Try:
- Pistachio pieces
- Almond slivers
- Saffron strands
- Cardamom powder
- Coconut flakes
- Rose petals suitable for food decoration
You can also create a festive sweet platter by arranging different peda varieties together.
How to Maintain Your Peda Maker Mould
Keep the Tool Clean and Ready for Use
Proper cleaning helps maintain the mould and prevents leftover sweet mixture from affecting future preparations.
After use:
- Remove all food residue.
- Wash according to the manufacturer's care instructions.
- Dry the mould completely before storage.
- Avoid leaving moisture trapped inside.
- Store it in a clean kitchen drawer or cabinet.
- Avoid sharp objects that could damage the mould.
Always follow the specific cleaning and usage instructions supplied with the product.
Choosing the Right Peda Maker Mould
What to Look For
When choosing a peda maker mould, consider:
Easy Operation
A hand-operated push or spring mechanism should be comfortable to use.
Consistent Shape
Choose a mould that produces the style and size of peda you prefer.
Durable Construction
The mould should be sturdy enough for repeated kitchen use.
Easy Cleaning
A simple design makes it easier to remove leftover peda mixture and maintain hygiene.
Comfortable Handling
A well-designed handle or press mechanism can make preparing larger batches more convenient.
Why a Peda Maker Mould Is a Useful Kitchen Essential
A peda maker mould can turn a time-consuming shaping process into a simpler and more consistent part of homemade sweet preparation.
Whether you're making traditional mawa pedas for a festival, preparing prasad for a pooja, or creating homemade sweets for guests, a mould helps you achieve attractive shapes with less manual effort.
It is particularly useful for beginners, families preparing large batches, and anyone who enjoys making traditional Indian sweets at home.
Explore the Peda Maker Mould here:
For more traditional kitchen inspiration, read our related blog:
https://90degreestore.com/blog/brass-mortar-and-pestle:-traditional-way-to-grind-spices-and-herbs
Frequently Asked Questions
1. What is a peda maker mould?
A peda maker mould is a kitchen tool designed to shape peda mixtures into uniform rounds or decorative forms using a hand-operated pressing mechanism.
2. Is a peda maker mould suitable for beginners?
Yes. It simplifies the shaping process and can help beginners create more consistent pedas without relying entirely on manual shaping techniques.
3. Can I use a peda maker mould for mawa pedas?
Yes. A peda mould can be used with suitable mawa or khoya-based peda mixtures once the mixture reaches the appropriate consistency for shaping.
4. How do I prevent peda mixture from sticking to the mould?
Depending on the product and recipe, lightly greasing the mould can help. Using the correct mixture consistency and releasing the peda gently can also reduce sticking.
5. Can a peda maker mould save time?
Yes. It can make the shaping stage faster, particularly when preparing a large number of pedas for festivals, celebrations, or gifting.
6. How should I clean a peda maker mould?
Remove leftover mixture and clean the mould according to the manufacturer's care instructions. Dry it thoroughly before storing to prevent moisture buildup.
7. Where can I buy a peda maker mould online?
You can explore the Peda Maker Mould from 90 Degree Store, designed to make shaping homemade pedas easier and more consistent.